DO NOT USE MY IMAGES TO SELL YOUR EBAY ITEMS (If you see someone using my images please let me know)

Friday 29 June 2012

NOTD - Vintage Bling

I cannot seem to get enough of LOOK Beauty Nail Pop polishes and with £2 off at the moment (plus my NUS discount) I've been slowly buying them up one by one. At £2.70 a polish I can't really say no to what I have come to discover is a high-quality, hard-wearing and long-lasting brand. Should I scoop more up before my no-buy kicks in?

Vintage is a creamy turquoise that resembles Color Club's New Bohemian but has a much better formula. Only 2 coats required for that perfect glossy finish whilst its counterpart requires 3. In terms of a drugstore dupe of Essie's Mint Candy Apple this is pretty close too, it's just a little more blue but I don't think anyone will notice!
Along with Vintage I also picked up Bling, a rose gold pink (is that how you would describe it?) glitter. Containing fine and larger hex pieces I have a feeling it's similar to the newly released Barry M Pink Silver Glitter. Here I have used it over Vintage to create some glittery tips!
Have a great weekend! x

Wednesday 27 June 2012

NOTD - Barry M Aqua Glitter over Balearic Cool

Hello ladies, hope everyone is having a good week so far. Can't believe it's Wednesday already, where does the time go? Barry M released 4 new glitters last week and yesterday I showed you Silver Multi Glitter.

Today I want to share with you my NOTD, Barry M's new Aqua Glitter over Models Own Balearic Cool. I ummmed and arred about wearing this gorgeous turquoise glitter alone but the thought of removing layers of glitter kind of put me off. Aqua glitter contains 2 different size glitters. The larger hex pieces stand out against the smaller bits that gives the overall finish a more '3D' look.
As I layered this over a base I'm not sure how many coats you would need for complete coverage but I would imagine 3 or 4 coats would do it.
Models Own Balearic Cool, 2 coats of Aqua Glitter and a top coat
I think this is my favourite polish out of the glitters Barry M have recently released. Staring at it makes me wish I was sat on a sunny beach surrounded by clear blue water and not on my couch in grey ole' London.

Tuesday 26 June 2012

New Barry M Silver Multi Glitter Swatch

Recently Barry M seem to be releasing polishes at a rate of knots. Last week they released 4 new glitter polishes and a few weeks before that they released the Chameleon polishes plus other shades. I'm not complaining but I'm hoping they don't release any next month as I'm imposing another no-buy.

Today I want to show you one of the new glitters which reminds me of the discontinued Silver Cascade. May be this is the replacement?

Anyway here is Silver Multi Glitter.
3 coats and a coat of Seche Vite.
Click to enlarge
Like the name suggests this is a silver glitter polish at heart but there is a mix of other colours thrown in. The glitter is extremely fine and in real life it's actually quite difficult to see all the colours which you see in the photo above but the colours are there. There is an advantage with fine glitter and that is you get a smoother finish but I would still recommend a top coat just to bring out the sparkle. I required three coats for complete coverage despite being quite densely packed and I would recommend allowing each layer to dry to avoid dragging and an uneven finish. Still I love it.

Have you tried any of the new glitter? What do you think of them?

Saturday 23 June 2012

Nail Pop Juice

Hey ladies, today I want to share with you a gorgeous polish from Look Beauty.
This is the gorgeous Juice from their Nail Pop range. It is a coral that leans towards pink. I'm not huge pink fan but I prefer pink corals to orange corals as they're so much more versatile and compliment my skin tone. I have a few Nail Pop polishes and I love every single one, they apply beautifully and last several days with minimal wear and chipping. This particularly polish is not 100% opaque as after two coats you can still see my nail line but this does not bother me because it's so hot.
Nail Pop is available from some Superdrug stores or from here. Priced at £5 each they're in the upper price bracket of drug store brands, however, there is currently £2 off, so go grab some you won't be disappointed.

Thursday 21 June 2012

WAH nail art pens half price

**Sadly the free express delivery has ended but the sale continues** Hi ladies just wanted to let you know Urban Outfitters have a free next day delivery service (UK only) if you order by 2pm (GMT) today. At the checkout you have to select Express Delivery and then enter: WKEND in the promo code box.

They have a sale on at the moment and I've picked up the WAH nail pens - £3 each, a bargain if like me you've been after some pens but a little unwilling to pay £6 a pop. They also have nail wraps in the sale too.

I'm not affiliated with UO in anyway but I wanted to share this great offer with you.

Let me know if you buy anything!

Wednesday 20 June 2012

Mermaid's Dream experiment part deux

You'll recall from yesterday's post I did a little experimenting with polishes I own to see if I could recreate DL's Mermaid's Dream, however, I couldn't compare it to the actual polish to see how well I did. Today whilst out shopping House of Fraser amazingly had the real deal in stock. I looked at it for a long time but managed to resist and walk away with just a swatch! After comparing it with my version on the nail wheel with the swatch I can confirm they look nothing alike. Well they could belong to the same family perhaps distant cousins?! Anyway with MD on my index finger I thought I'd see if I could come up with anything better. Here is what I managed...
  • Index: Deborah Lippmann - Mermaid's Dream
  • Middle - CC - Perfect Molten, SC - Hottie, Essence, OPI - Spark de Triomphe
  • Ring: Essie - Mint Candy Apple, OPI - Spark de Triomphe, Essence
  • Little: H&M - Lady Luck, SC - Hottie, Essence, Sponge on CC - Pefect Molten and S'he Stylezone -  471

In terms of colour my ring finger is the closest. I think if I had a polish with small blue glitter it would have worked even better but I'm happy with the result nonetheless, in fact I'm liking all the different versions. What about you, which is your fav?

Tuesday 19 June 2012

My version of DL Mermaid's Dream - A Layering Experiment

After my swatching early I wondered whether I could actually re-create Deborah Lippmann's Mermaid's Dream using polishes I own. I don't have the real thing so I used photos as a guide. It's probably nothing like the real polish but my lemming has been squished for the time being.
L-R: H&M - Lady Luck, Sinful Colors - Hottie, Essence, S-he Stylezone - 471, Color Club - Perfect Molten
One coat of Lady Luck, then a coat of the glitters. After that sponge on the foils!
Do you have the real thing? What do you think of my version?

***this is my 200th post***

S-he Stylezone - 471 plus essence Special Effect Topper

After 4 days I have finally taken my summery gradient mani off. It's been a long time since I have worn a mani for any length of time but I particularly enjoyed wearing this gradient and there was hardly any tip wear. I wonder if this was due to do with the new Essie ridge filling base coat and lack of Seche Vite top coat?

Today I want to show you another two of the polishes sent to me by Mateja...
S-he Stylezone - 471 is a very pale blue foil which applies wonderfully and only requires two coats. I'm not the biggest fan of foils but this one is quite nice but I can't put my finger on why. May be it's because it's not too silvery? I remember Mateja on her blog putting a glitter over this foil so I decided to paint a layer of the Essence Special Effect Topper she also sent me which contains a mix of blue and peachy iridescent hex glitter is different sizes in a clear base. The colours remind me a little of Deborah Lippmann's Glitter In The Air, however, on the nail combined with the foil it reminds me of Mermaid's Dream but obviously lacking the green. Don't see it? Never mind! This glitter like other glitters requires some strategic dabbing but overall a lovely topper that dries well and would look great over so many colours. Do you have these polishes?

Do you have any suggestions what other polishes I could layer the glitter over?
*off to file my nails they're getting a bit long!

Sunday 17 June 2012

Furry Fuzzy Neon Leopard Mani with a little glitter

I'm super excited to be showing you this neon leopard print manicure because a) I've never created a full leopard print mani before b) I utilised an awesome technique that Jen from ThePolishAholic developed a couple of months back and c) it's neon and neon is in!

I've been itching to create a leopard print mani but until now have not really got round to it. It's been done to death but that's because it's a really eye catching nail design that looks quite professional but very easy to create using some basic steps. Now me being me I'm not really content with doing something simply and will if I can push a design a little further. Basically I just like to create work for myself! So that is what I did with this mani. Using flocking powder I found for 99p I made my spots furry! (There was some glitter mixed in with the flock powder which is why you can see some sparkle)! I made a bit of a mess but it was well worth it and I hope to give this a go on my actual nails asap!

Falsies don't fit my nails well I know!
What do you think?
 If you give this a go please let me know I would love to see!

Thursday 14 June 2012

Summery gradient

Back in April I created this funky french mani. The two colours really worked well together so I decided to create a gradient mani using the same colour combo. However, instead of using China Glaze For Audrey I used Color Club's Take Me To Your Chateau as it is very opaque and less likely to be dulled by the coral which I found out is called Oh Naturale.
Transition between colours a lot more seamless IRL.
Gradient manis are very popular at the moment and there are a number of techniques you can use to create the look. The technique that I find works best for me is to paint my nail with the less opaque polish first and let it dry. Then on a sponge (I use cheapy make-up sponges from Poundland) paint the two colours and sponge on the nail.

Are you loving the gradient trend? 

Wednesday 13 June 2012

Ombré Ombré Manicure

If you follow me on Instagram or Twitter you may have seen this manicure already but for those that don't here is my 'Ombré Ombré' skittle manicure I created on some falsies.
I freehanded these which was the easy part, finding all the colours was the challenging bit!
Hope you like them as much as I do! 
That's my shower curtain!
I didn't stick these on properly as you can probably tell! lol
Corals: Barry M - Peach Melba Color Club - Oh Naturale Boots 17 - Orange Soda Look Beauty - Juice Barry M - Coral 
Blues: Barry M - Blue Moon Color Club - Take Me To Your Chateau Barry M - Blueberry Ice Cream Barry M - Cobalt Blue Nails Inc - Denim 
Pinks: Barry M - Strawberry Ice Cream Color Club - I believe In Amour Color Club - Poptastic Color Club - Warhol Barry M - Shocking Pink 
Lilacs: Color Club - Sweet Rendezvous Ciate - Bon Bon Topshop - Mink China Glaze - Below Deck Color Club - Rad Nomad 
Greens: Color Club - Twiggie Maybelline Colorama - Green Park M&S - Jade Topshop - Carry On Camping Color Club - Artsy Crafty

Tuesday 12 June 2012

H&M Peppermint Fusion

This polish has been around for a while, however, it was only recently I found it in my local H&M. From a distance it looks like a plain periwinkle creme but on closer inspection there is also a subtle light blue shimmer that adds a little more dimension to the finish.
Now that I have it and have worn it on my nails I can understand the love for this polish. It's very feminine and I would imagine flattering against any skintone. The only downside to this polish is that it required 3 coats and that it bubbled in some areas, though this could be partly my fault as I applied quite thick coats and didn't allow each coat dry properly before applying the next.

Do you have this polish and have you experienced any bubbling?

Monday 11 June 2012

Dupe of essence Choose Me!

Whilst I was photographing Essence Choose Me! I had an inkling I had photographed the same polish before. This evening whilst going through my Helmer my suspicions were confirmed. Take a look at these pictures...

So can you tell which is which?
Index and Ring: Choose Me!. Middle and Little: Sea of Cortez

essence Colour & Go - Choose Me!

I'm on a bit of a roll with swatching the Essence polishes I received from Mateja so expect to see more in the coming days and weeks. Here is the gorgeous Choose Me! which is said to be a pretty spot on dupe for OPI's discontinued Catch Me In Your Net and Zoya's Charla. Unfortunately I don't have the latter two but there are good comparisons floating around.

Choose Me! is a gorgeous blue/green polish with gold foil/glitter. Now my photos show the nail line peeping through but this is actually less apparent in person. The weather has been so pants here in the UK I've had to photograph under my daylight blubs and they're strong.
Two Coats no top coat.
So far I've been really impressed with Essence polishes. I wish they would think about launching in the UK.

Sunday 10 June 2012

essence Nail Colour 3 - Midnight Date

Hi there!
Today I want to share with you Essence 'Midnight Date' from the Colour3 range. I received this from the lovely Mateja from  Rainbows and Blues.

So let's see...
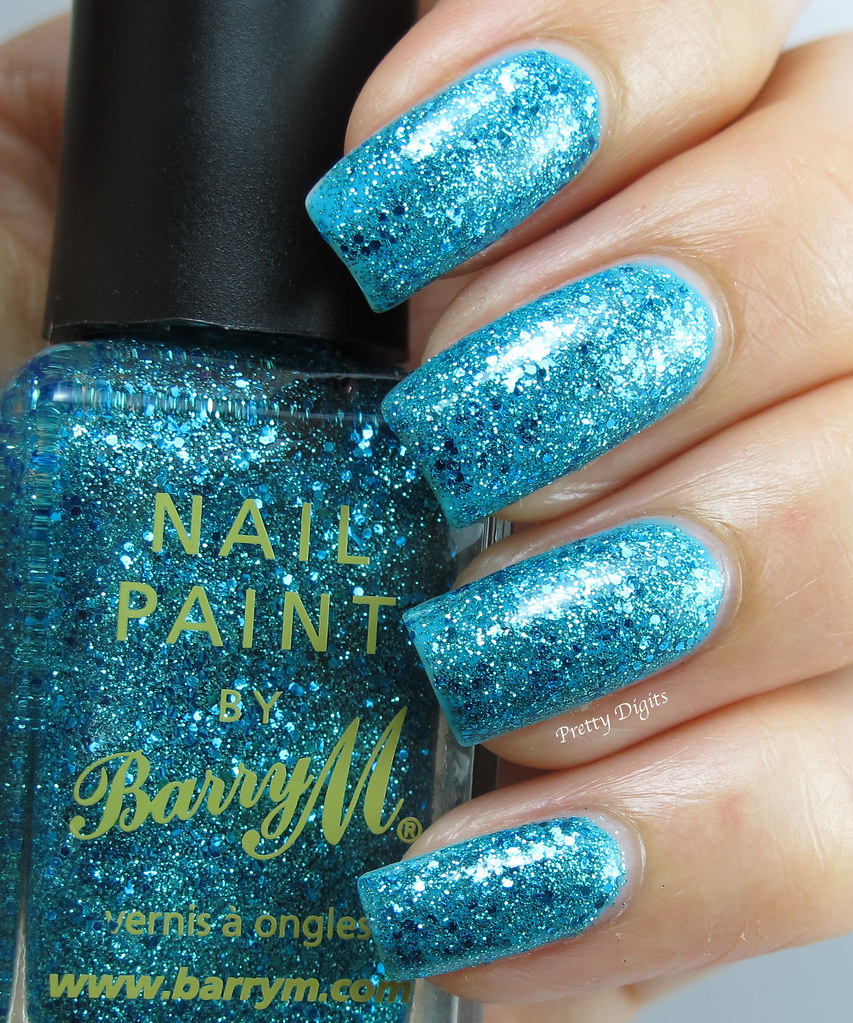
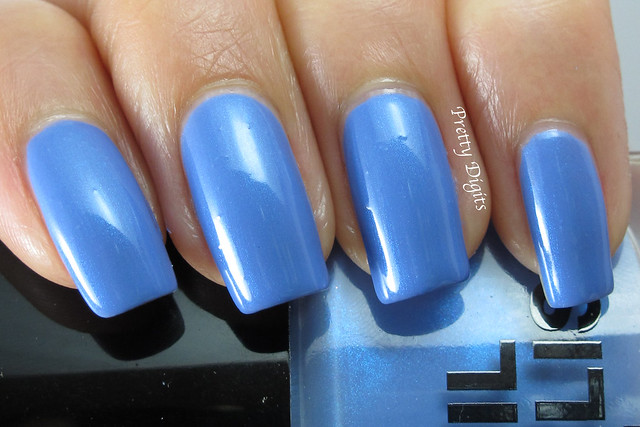
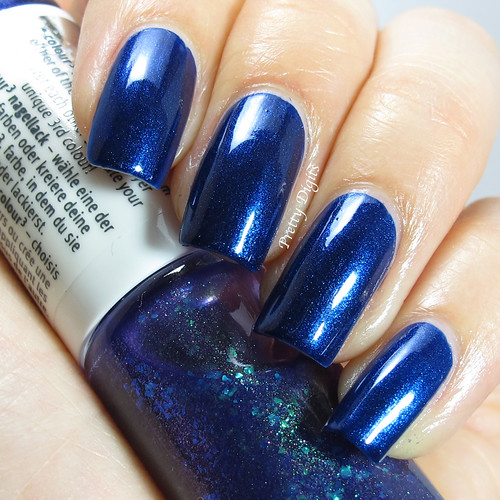
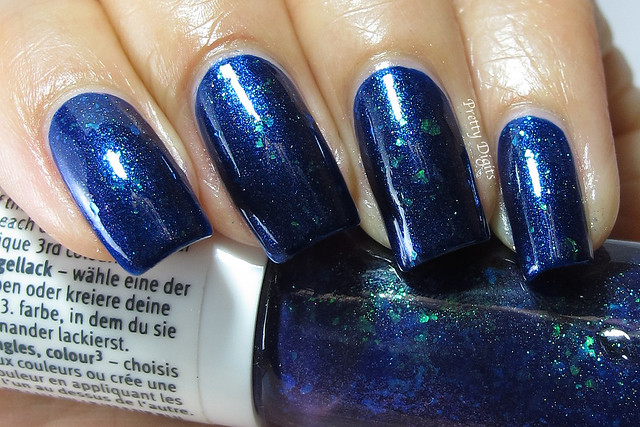
This duo consists of a gorgeous Navy 'base' that shifts between purple and teal and a flakie 'top coat' that has the same colour shift.
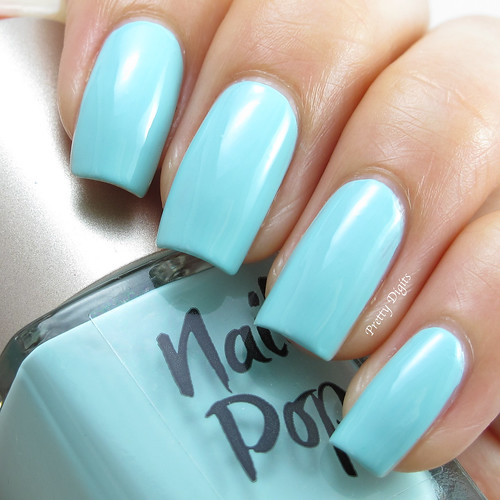
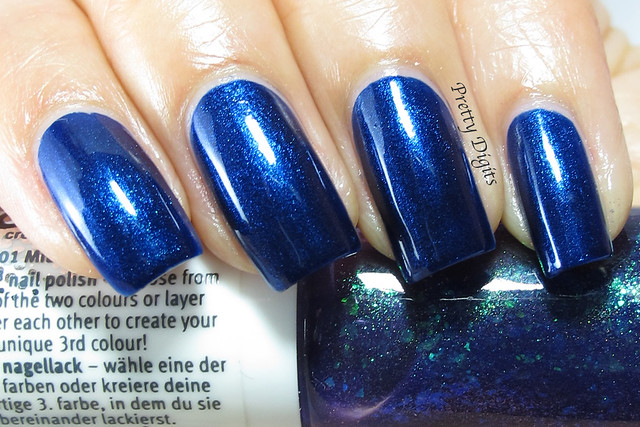
This is the base alone. The quality is fantastic and easily a one coater but the picture shows two due to habit! It dries quickly and to a glossy finish.
As you can see I have failed miserably at capturing the multichrome-ness of this polish so you will have to believe me that it shifts to purple and teal!
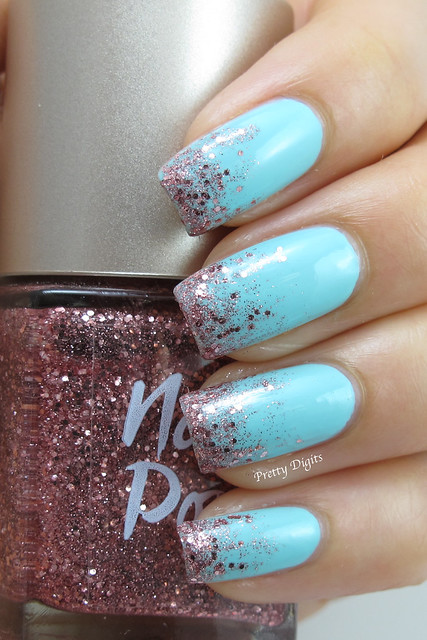
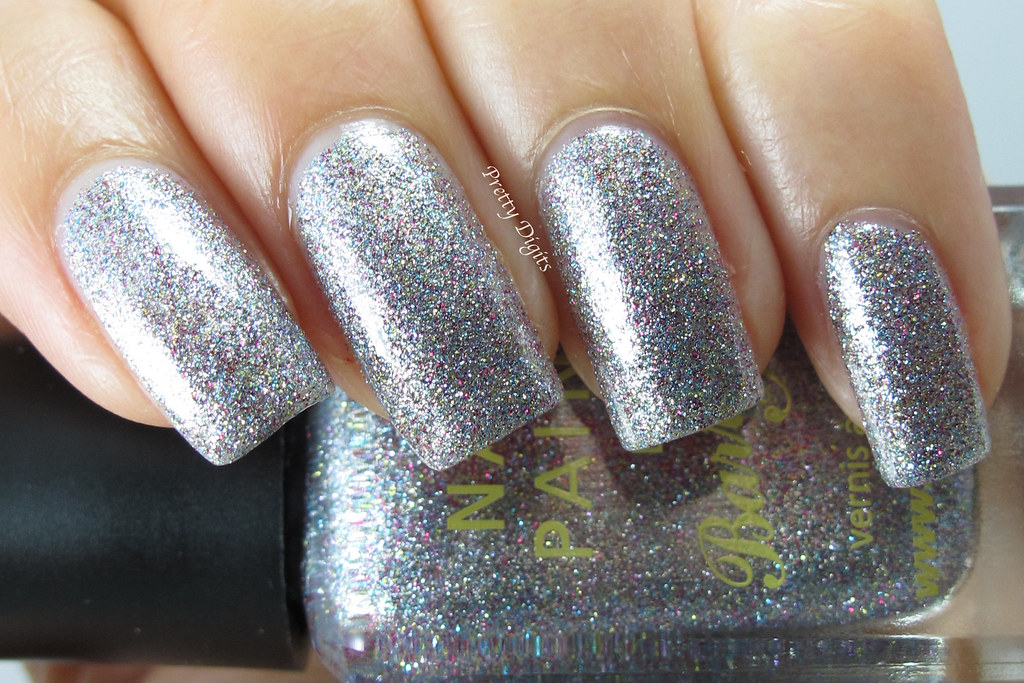
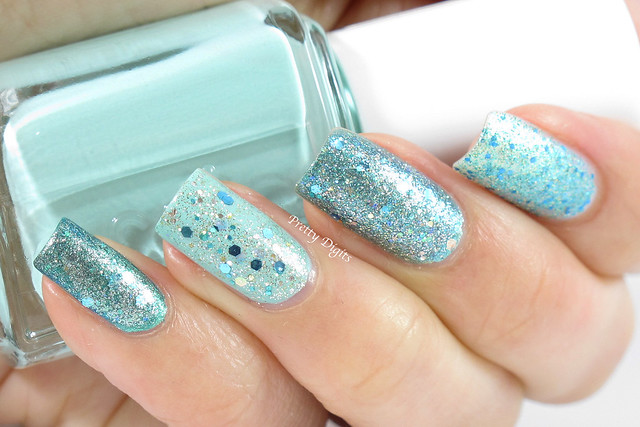
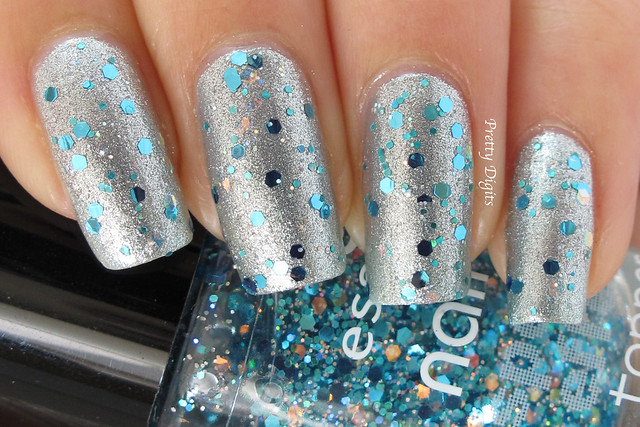
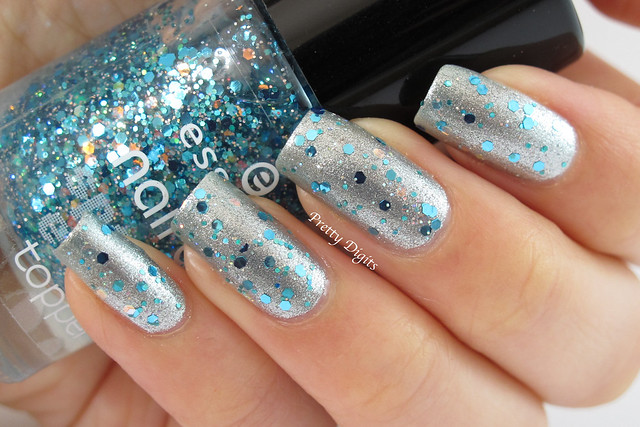
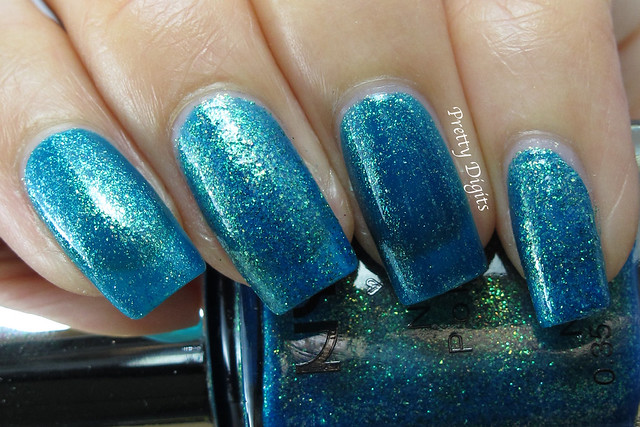
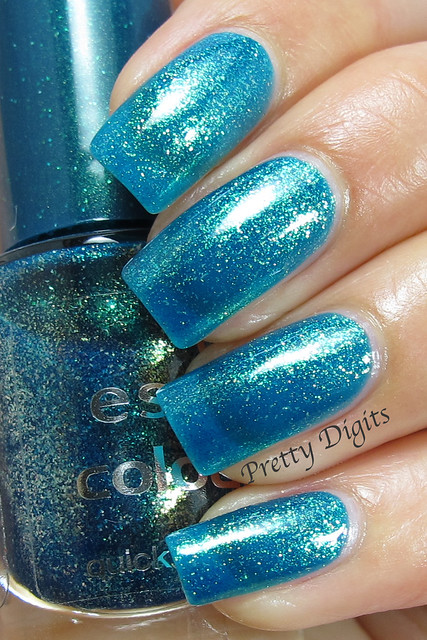
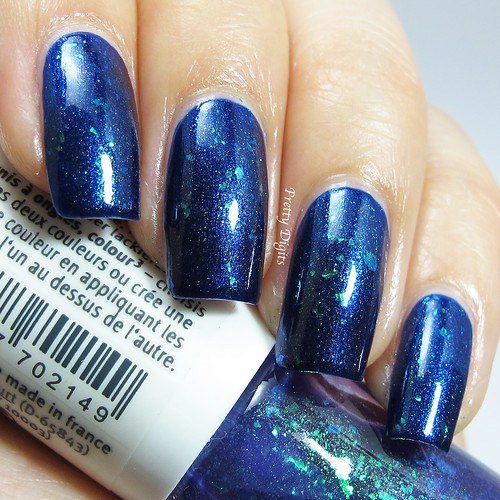
These duo polishes allow you the choice of wearing the polishes alone or layered. Here I have layered the flakie over the navy base.
The navy base alone is lovely but with the flakie on top it just another dimension to the overall finish. One thing I would say is that after applying the flakie you'll need to add another topcoat if you want a glossy finish.
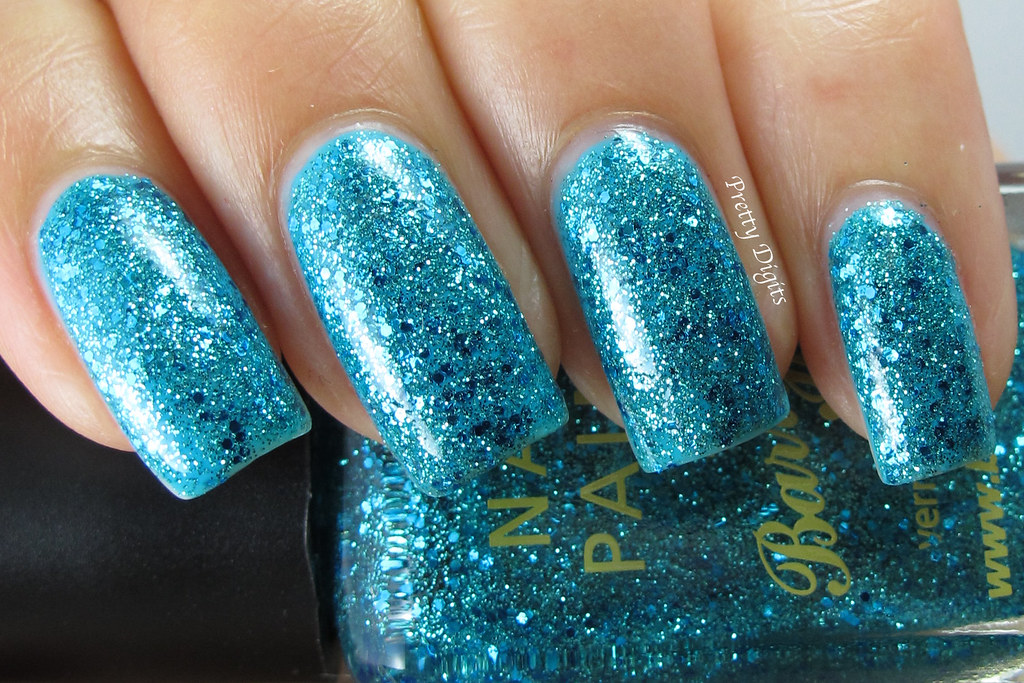
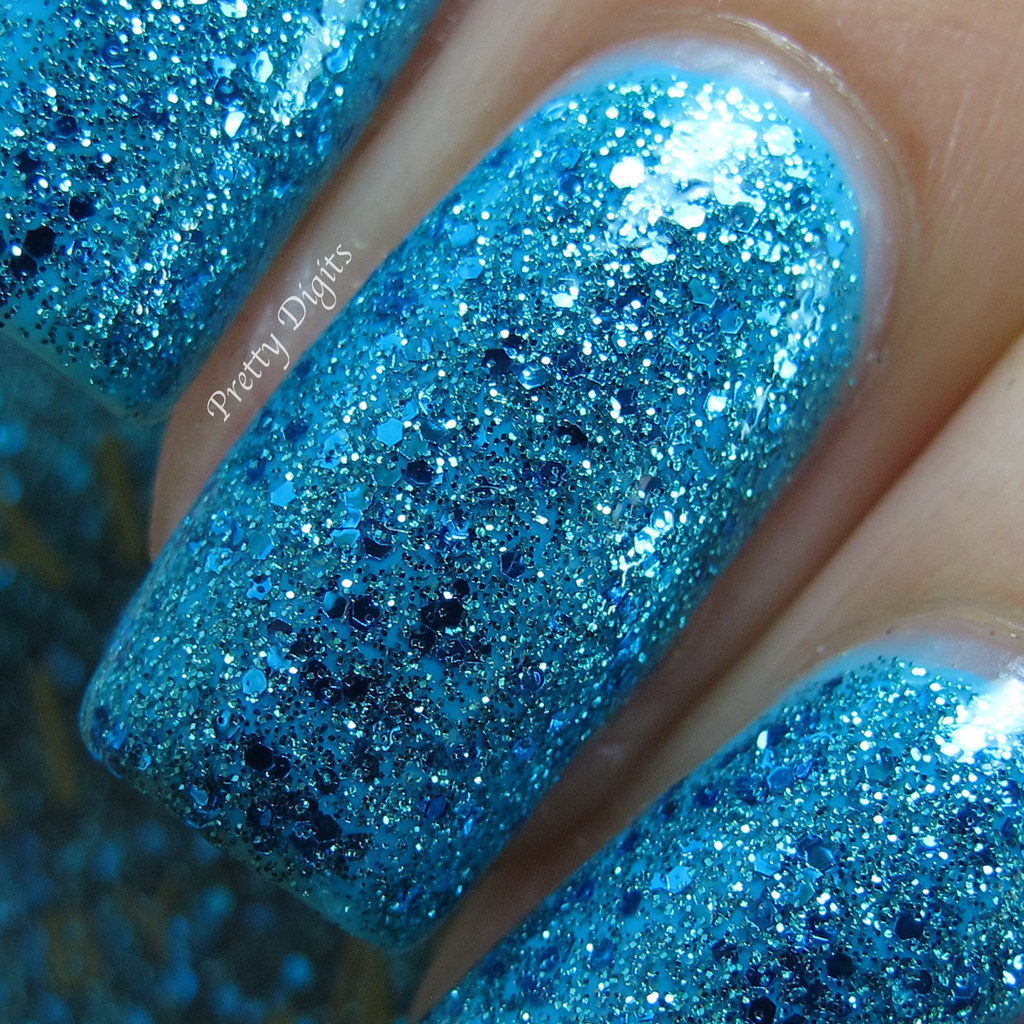
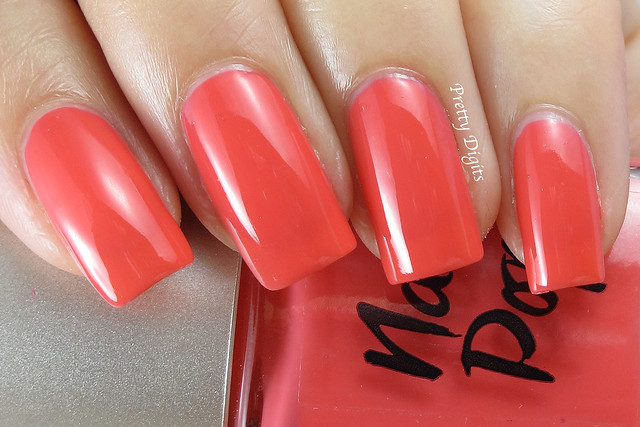
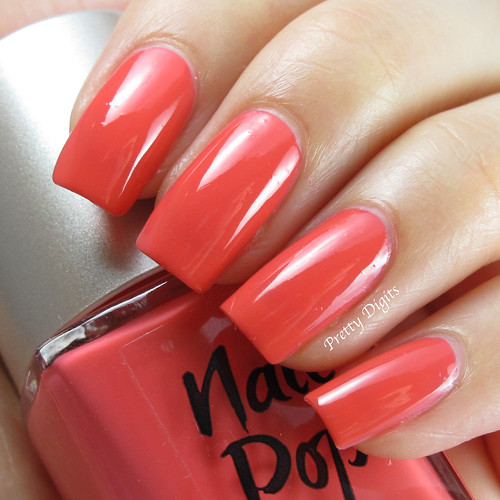
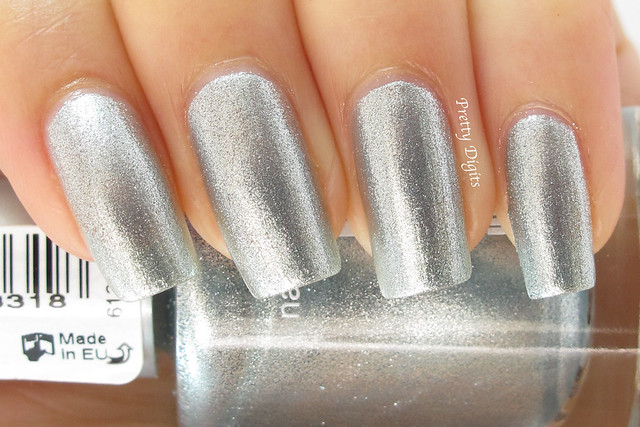
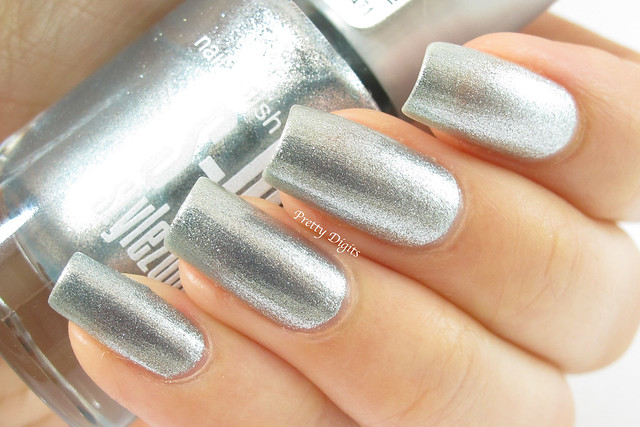
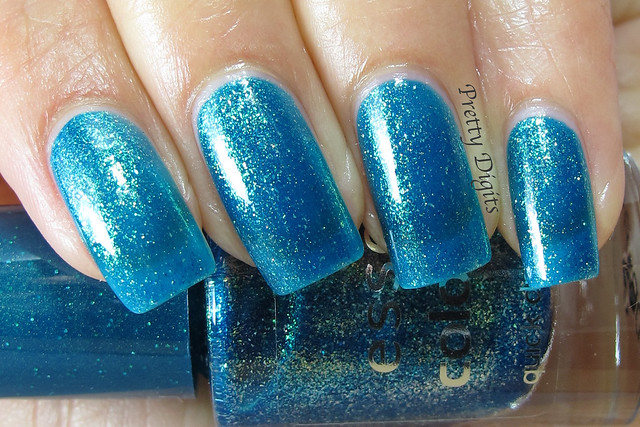
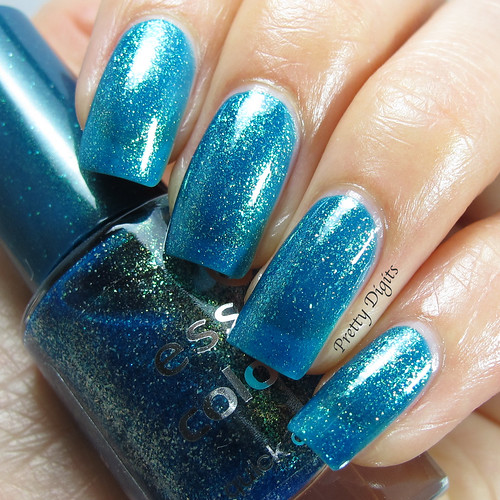
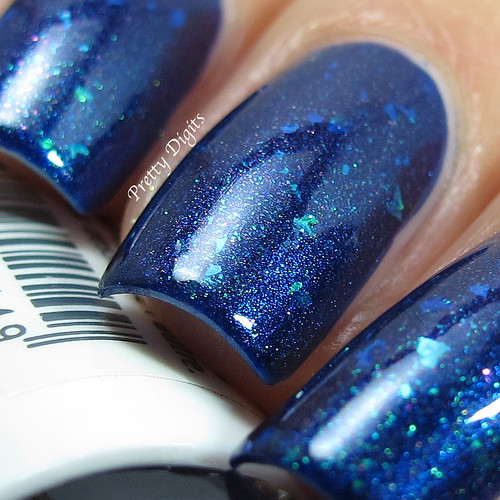
And here is a picture of the flakie alone (2 coats). In the picture this looks very sheer but in real life the nail line is not as visible.

Overall I love this duo, what I don't love is the packaging as it's a pain in the ass to store!

Hope you enjoyed the pictures xx